Building a public art installation
In the interest of blogging more often, I’m trying to reduce the barrier to entry for what I consider a blog post and just getting more stuff out there. So, less polish and more “here’s where my head is at” with this one.
Last Fall, I applied for and was accepted into the Portland Mini Maker Faire, where I exhibited a homemade sensing glove which translated your movements into an augmented reality (AR) environment. I’m working on rebuilding the glove using new skills and methods, so stay tuned on more details from that project, but in the meantime, you can check out some code and other resources from it on GitHub.

The project was a hit, and the process leading up to running a booth for the weekend—learning, building, experimenting, and meeting the deadline—made me want to do it again.
Shortly afterwards, I had the opportunity to apply to the Portland Winter Light Festival and was also accepted to that! This is the same in some ways: something built for the public, a goal that would require a lot of learning and experimentation along the way, and multidisciplinary building. But it’s also very different: an installation that is left unattended and which has to withstand both the (potentially nasty) elements as well as the (potentially rough) curious public, a much larger size and scale, and a much higher requisite level of polish and stability.
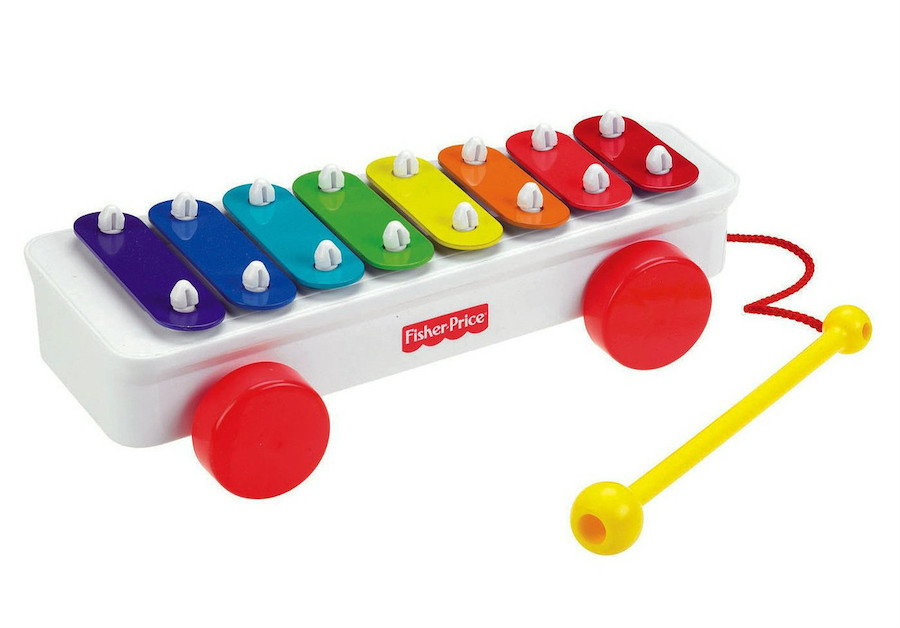
The best and shortest way that I can sum up the concept is a large, xylophone-like cabinet, the top of which is made of plexiglass or similar transparent materials. Underneath the top, you see many repurposed and reused items, organized by color. Each color zone can be hit with mallets and will light up brightly and generate lots of beautiful sound.
Basically, think this:

But electronic, furniture-sized, outdoors, at night, loudly and brightly interactive, and made of junk.
In the past few days, I’ve focused on these areas in order to arrive at proving the electronic concept today:
- Finding the right surface material, which ended up being polycarbonate
- Visiting a drum shop and learning about mallet materials
- Building a quick test rig to hold the material
- Learning a lot about Raspberry Pi & Linux audio and MIDI, including building a low-latency synthesizer setup
- Testing piezo sensor disks in order to pick up vibrations, translating them into beeps
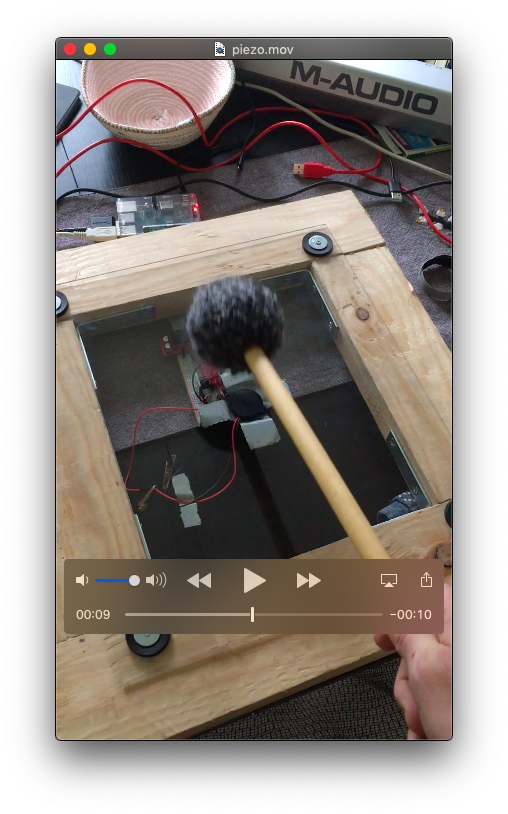
- And finally, connecting all of the above in order to generate MIDI tones based on mallet strike force on the surface
Here’s what I got working today:
Stay tuned for more soon—I’ll be doing a ton of work on this in the coming weeks in advance of the festival in early February. And come by and see it in person!
