Project 386 #3: First signs of life
On Day 22, finally, I got a hint that I may be able to get this project running in its original incarnation. But first, I’ll take a step back as well as, at the end, address the all-important question of: why?
The hole is deep 🕳️
When I’m working on bigger projects on my own schedule (side projects or otherwise), there is always one thing I find easy and one thing I find difficult.
It’s easy for me to get obsessed, going way down multiple rabbit holes, devouring all of the info even tangentially related to the project, often filing it away for potential future use. This can also manifest as a lot of browser tabs.
And it’s difficult for me to just stop, step back, and especially, to write about the project when it’s only partway through—and maybe never going to get to completion (fingers still crossed on this one, though).
I do step back, but it’s not my first inclination, and it takes effort. I think that it’s important, though, because I think that it has three benefits:
- The selfish one, which is to maybe receive comments or feedback from others that could help with the project
- The generous one, which is to contribute what I’ve figured out back to the world in the hopes that it’s useful to someone, somewhere
- The rubber ducking one, which is good across many disciplines, and serves in a similar capacity to teaching or giving a talk on a topic—to in fact cement what you do know, and to force you to make sure that you really do in fact know what you think that you know
Sunk costs 💰
Right now, I’ve got dozens of hours logged trying to revive this—if I’m being honest—fairly crappy computer. As of this morning, I’ve got 140 bookmarks to links that I’ve read and either am actively referring to or may go back to. These range from 1980s reference manuals, to blog posts, to schematics, to forum discussions, to various modern and vintage obscure operating systems, to online auctions with photos of similar systems or components.
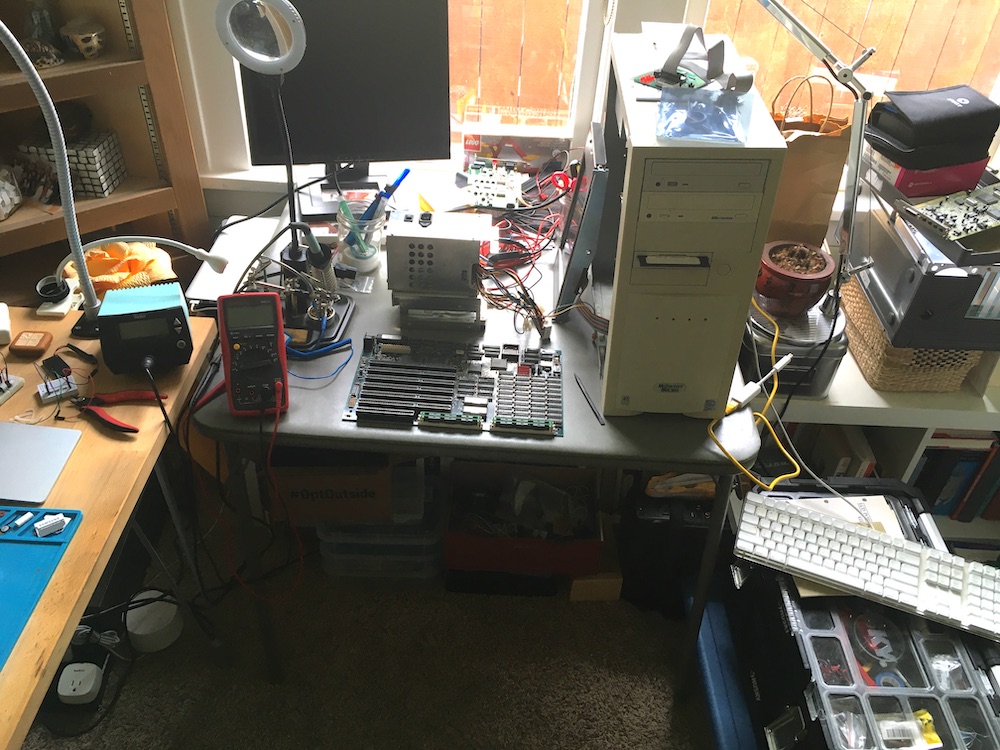
As of this morning, the workspace next to my desk looks like this
I’m making the best of home space during COVID-19. This is the sort of project probably best kept at home rather than my shop, anyway, due to small parts and the risk of dust. But it’s gradually eating more and more space.
So far, I’m still less than $100 into the project, materials-wise.
Anyway, here’s what I’ve been up to most recently with the project.
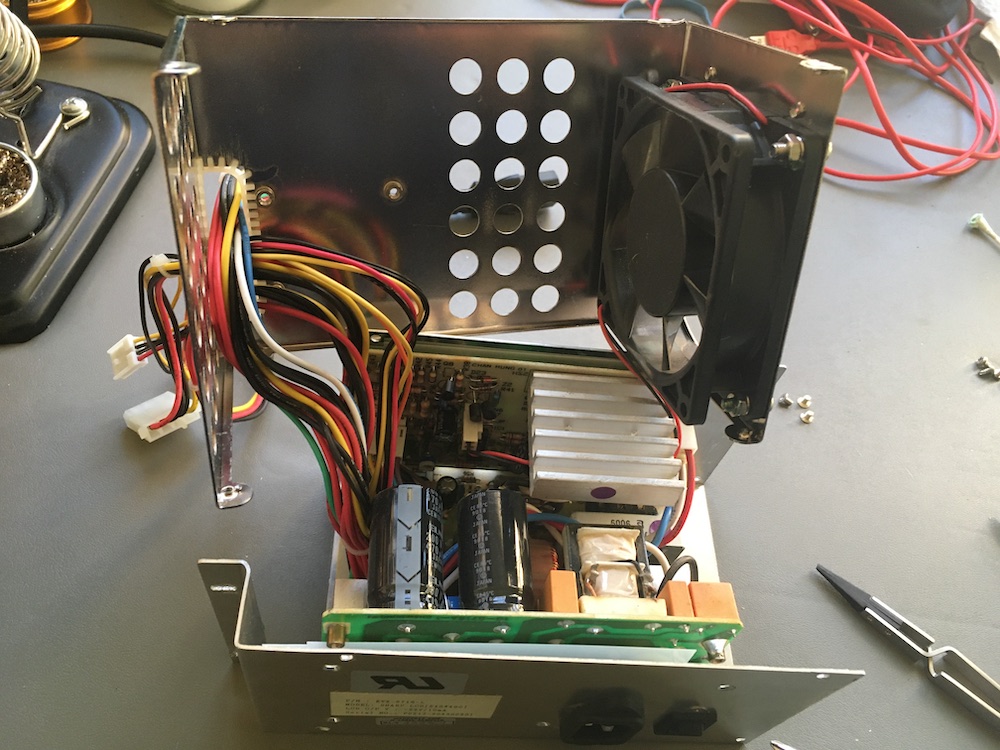
Power supply 🔌
I decided to re-examine the power supply to look for visibly bad capacitors and to test the board with other power supplies (acquired cheaply and COVID-safely locally via Craigslist).
Don’t touch those capacitors!
Even though the voltages seemed ok last time, there is the possiblity of ripple or other crappiness causing problems. But hooking up the computer to a new power supply produces the same beep. Things are probably looking and working ok with the original power supply, but I will have to keep in mind to check this angle again when I (hopefully) get past the beep.
This was a pretty quick job, and now I have two modern-but-AT power supplies acquired for $15 total that could come in handy for bench projects in the future (since they provide +5V, -5V, +12V, and -12V). And I also figured out that most AT supplies aren’t going to have a button on the back like this one does (so you can reach around the back of the computer to turn it on) or are going to be as small as this one is (to fit inside the tight constraints of this portable).
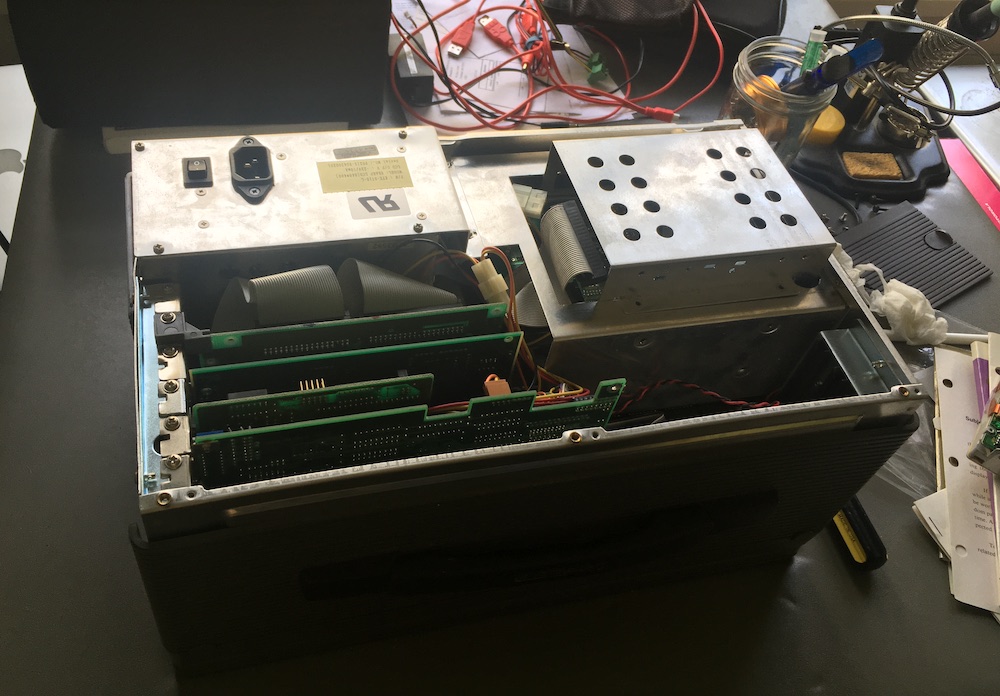
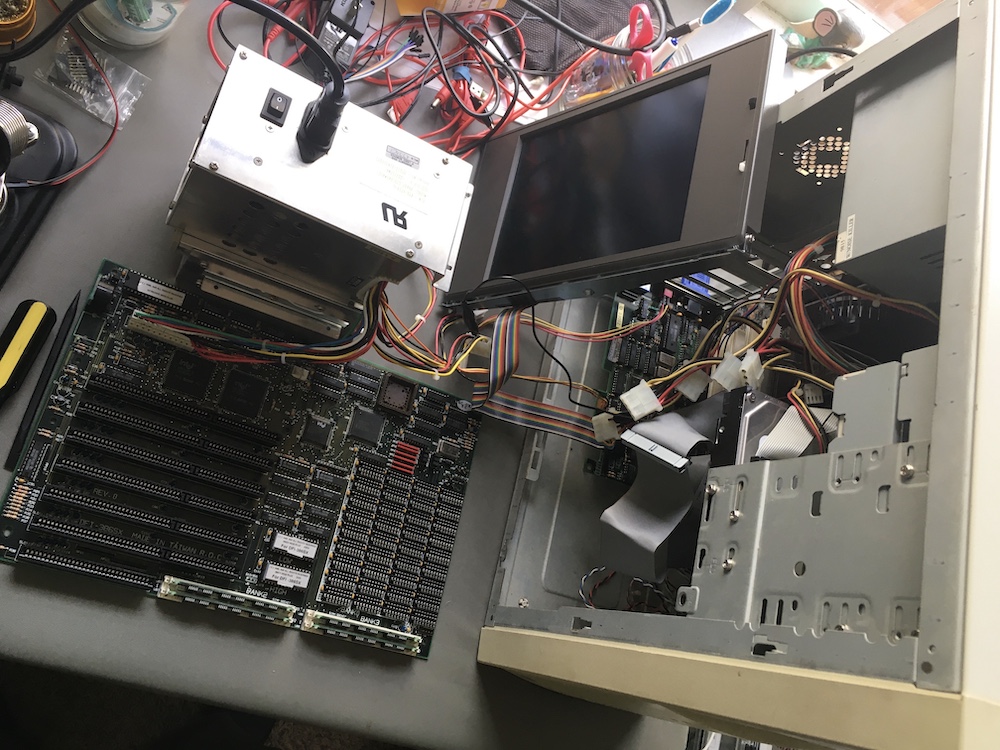
This is the computer before I took it apart. The 200W power supply is the big shiny box in the upper left. Not much room to work with. I’m glad that one still works—desktop ones are larger.
That #$@&%*! beep 😫
I wanted to confirm that the continuous beep is in fact continuous, and to determine its frequency. I did this mostly to get more familiar with using a logic analyzer by starting with a relatively simple task. But I got the idea because I had seen a few posts here and there that seemed to indicate that sometimes, rapid multiple beeps can sound like one beep, or what sounds like continuous rapid beeping in fact has a slight pause after, say, the seventeenth beep. These beep codes can often indicate what’s actually going on. In this case, I do think that the board isn’t getting to the point of any sort of beep codes, but I wanted to be sure.
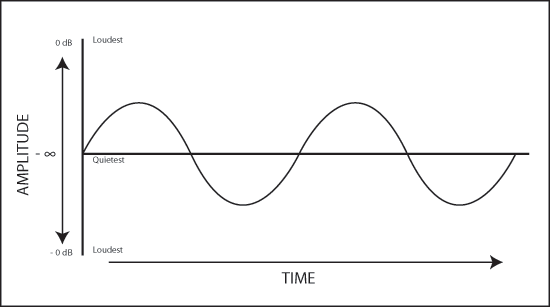
The way speakers work is that the electronics will send pulses of electricity thousands of times per second, vibrating a membrane (usually via a magnet), which vibrates the air, which vibrates your eardrum if you’re close enough.
If it’s a pure tone, like the kind you’d describe as a “beep”, it’s probably a pure wave, the cleanest-sounding of which is a sine wave.
Start adding multiple simultaneous beeps in a chord and the wave gets more complex.
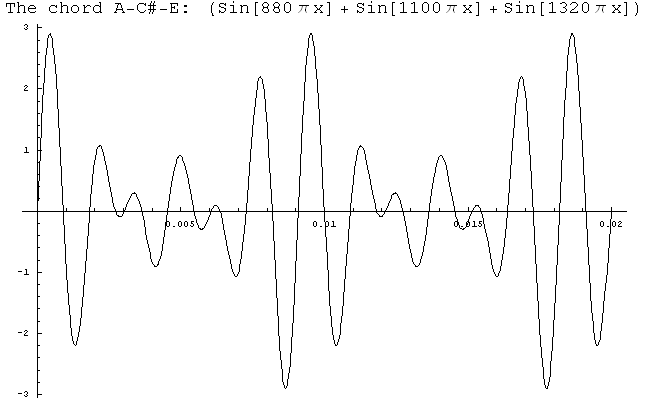
Eventually you get to speech, or music, or other highly complex audio.
In my case, I know it’s just a beep, so I would expect a sine wave. If I hook up two probes to the two wires where the PC speaker was attached, I can measure the wave.
An oscilloscope could show me the waveform.
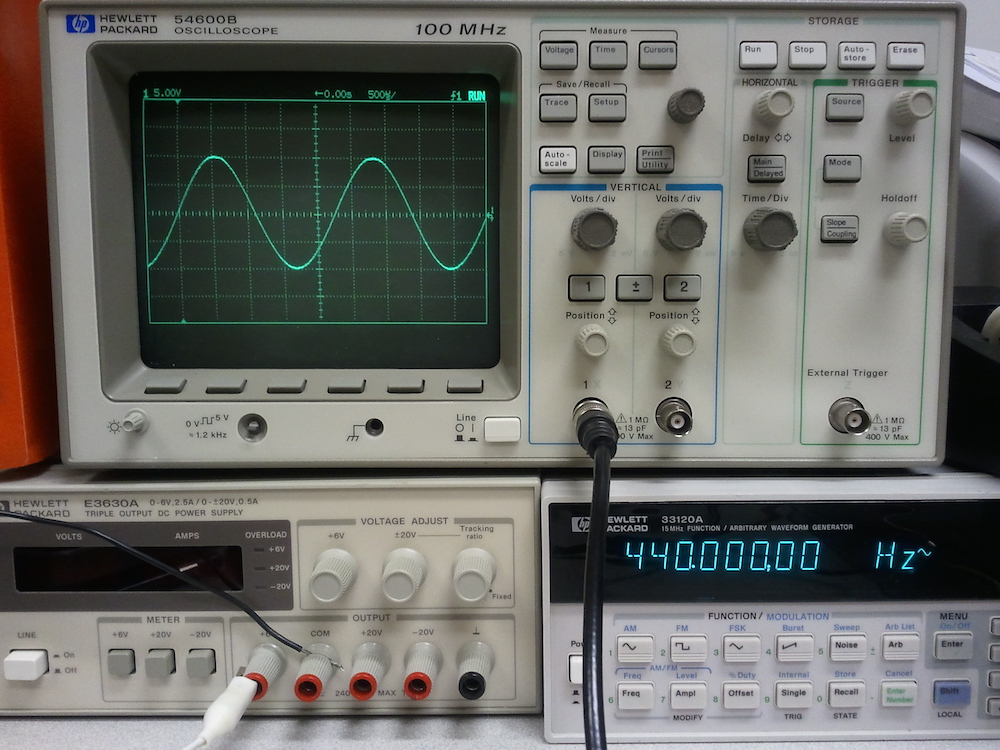
From Oscilloscope Basics
But I haven’t invested in an oscilloscope yet. I did, however, get a $15 USB logic analyzer, which can at least show me the low and high points of the waves at high resolution—even millions of times per second.
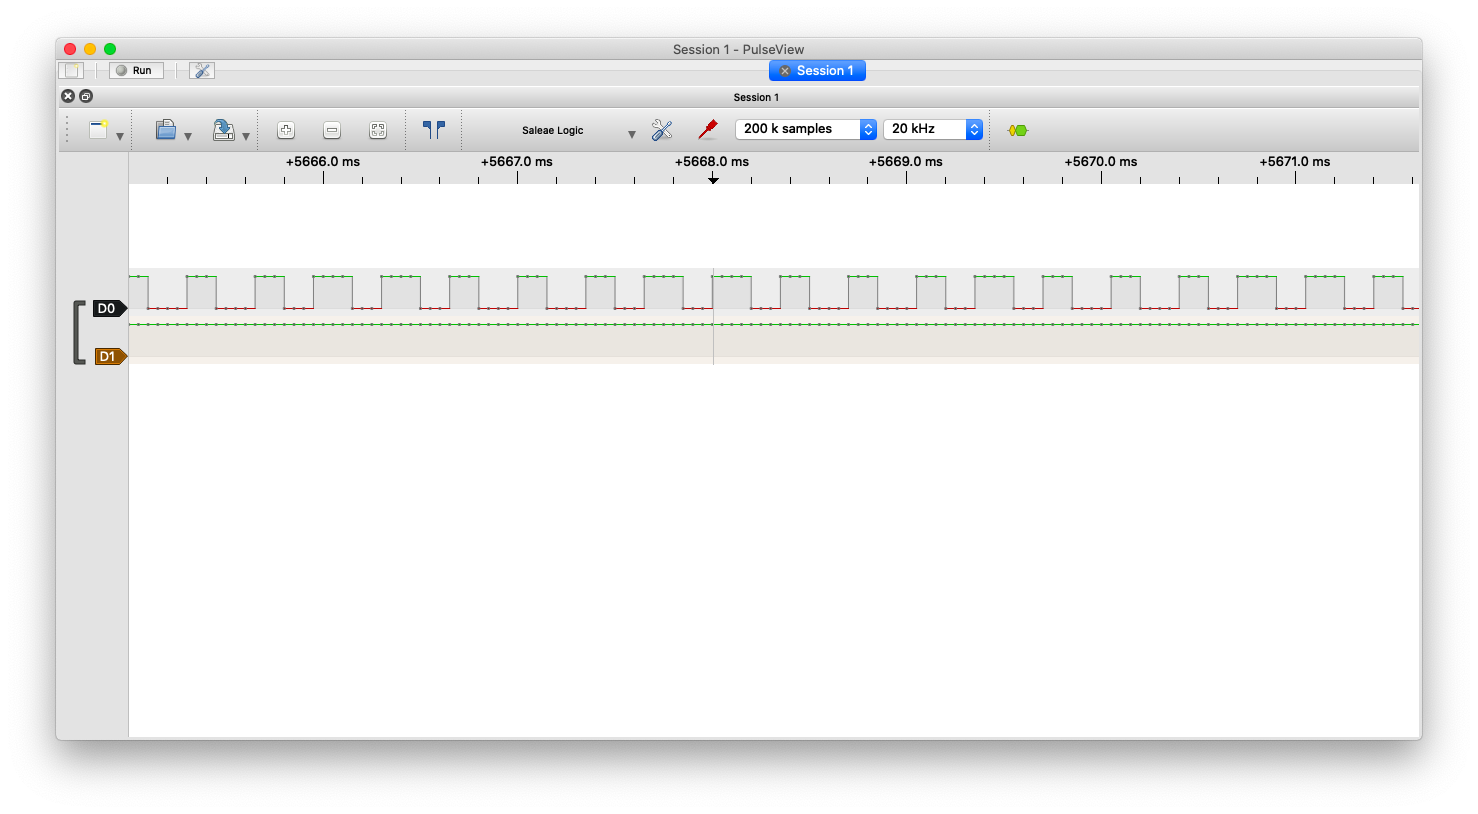
I hooked it up, started the analysis program, and turned on the PC. I didn’t hear the beep (since the speaker was disconnected), but I could see it!
Count the highs and lows and you can see three full cycles per millisecond, or 3,000 cycles per second (also called 3kHz). That sounds about right, but I used sox on my Mac to generate a 3kHz tone just to confirm that it was the same pitch.
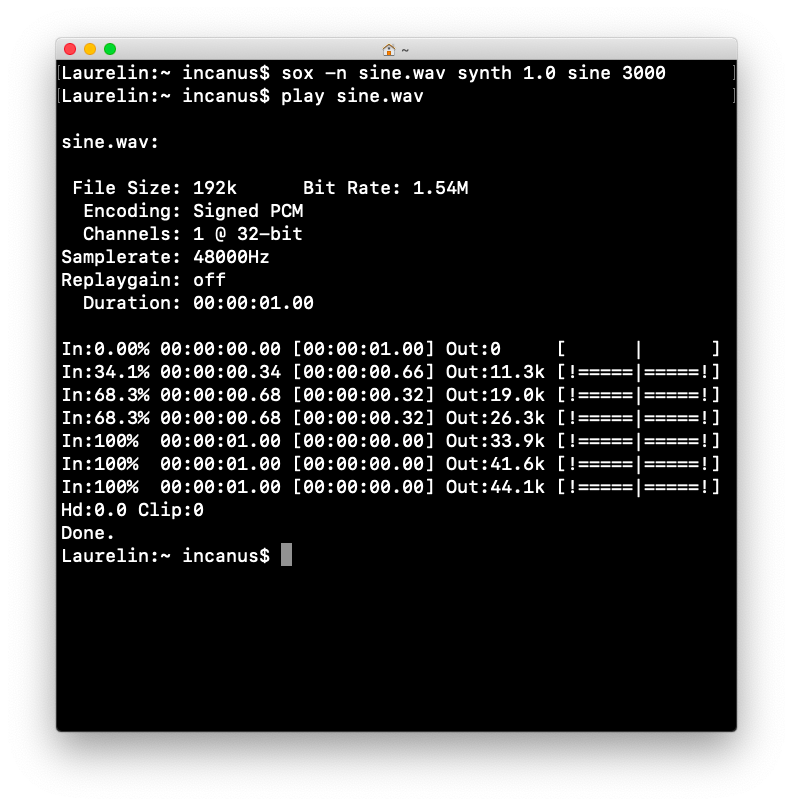
(Narrator: It was.)
You, too, can do this if you want to hear firsthand the sound that haunts my dreams.
The promised signs of life 🤞🏻
I thought it was time to dig a bit deeper and try to reach a fork in the road. Are the very custom oddball video card and its partner, the LCD screen, actually going to work at any point? The odds are not good at finding another one—see for example this post about a busted card or this “museum” page from the Czech Republic which seems to show ownership of one of these in any state as a badge of honor. And if those don’t work, the whole idea of keeping this machine vintage pretty much go up in smoke (so to speak) since running things in the small case on an attached 9" LCD screen become much more difficult. At that point, it’s just another 386—cool in its own right, maybe, but not self-contained in any way. If one or both didn’t work, the choice then becomes: do I replace the LCD with, say, an iPad or some modern screen? And then emulate the vintage display looks? Or not? Or just give up and throw it on the scrap heap?
At first, I thought this would require another computer, one with a vintage ISA slot, in order to plug in the video card. ISA dates to 1981 with the IBM PC/AT. I remember a migration in the late 90s when I was building PCs in college from ISA to PCI for things like sound cards and modems and to AGP for graphics, back when Quake II & III and that sort of thing were in my wheelhouse.
In a bit of rubber ducking with some friends on Slack, I realized that my old desktop PC indeed still had one ISA slot! I had an old sound card in it, and since until this project I hadn’t booted the computer in ten years, and before that, used Macs as my primary devices for almost ten years before that, I hadn’t even really used that sound card since the dawn of the millennium anyway. It is large and was in the bottom of the case, so it sort of obscured the interface. Kind of amazing, really, that I had next to me a working bridge to 1981 technology standards. I really didn’t want to have to buy another computer just to move this project along.
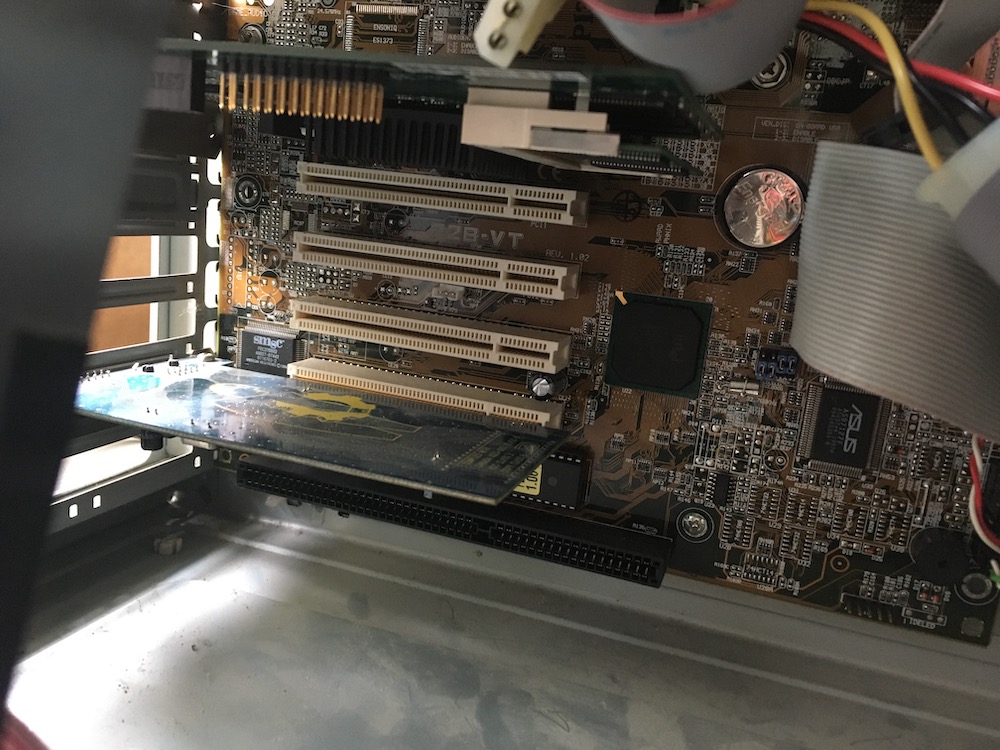
From top to bottom: one AGP, four PCI, and one ISA
Now the trick was power to the LCD. This card is especially weird since, like normal video cards, it has a VGA port in the back, but inside the case, it also has a 20-pin ribbon connector to the LCD, as well as a toggle switch on the back that controls power to a special connector from the power supply that provides +12V and -22V back to the LCD through the ribbon. So the video card, LCD, and the power supply are all unique to this sort of portable computer.
But the card would have to be put in my newer computer, which first, has an ATX-style power supply, and second, doesn’t have the special connectors or a -22V output.
I’ve learned enough about electronics (mostly through weird logic errors with LED projects) to know that common ground is important if I’m going to combine voltage sources. I decided to rig up something like this:
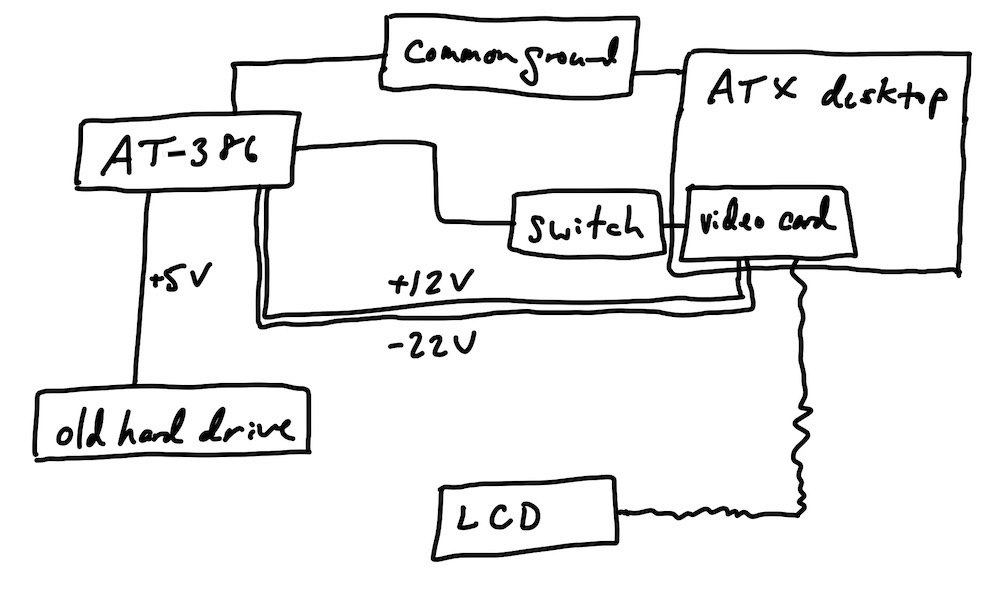
Not an actual schematic
The 386’s old (still untested, but powering up) hard drive was connected to the original system as a load, since the AT power supply fan won’t come on unless there is something running. The ribbon to the LCD is pretty short (since it’s meant to be inside the portable case), so space was tight. And the common ground is just a wire with alligator clips between a ground wire on a spare hard drive connector on each power supply. When all was said and done, the setup looks like this:
The black wire near the rainbow ribbon cable is the common ground
And you know what? It actually worked! I had to fiddle and swap the setup back and forth with my normal video card a bit because my computer wasn’t set to use ISA video devices at first (and I needed to see what I was doing to change the setting), but eventually, it took to it like a rubber duck to water.

The LCD and video card are alive!
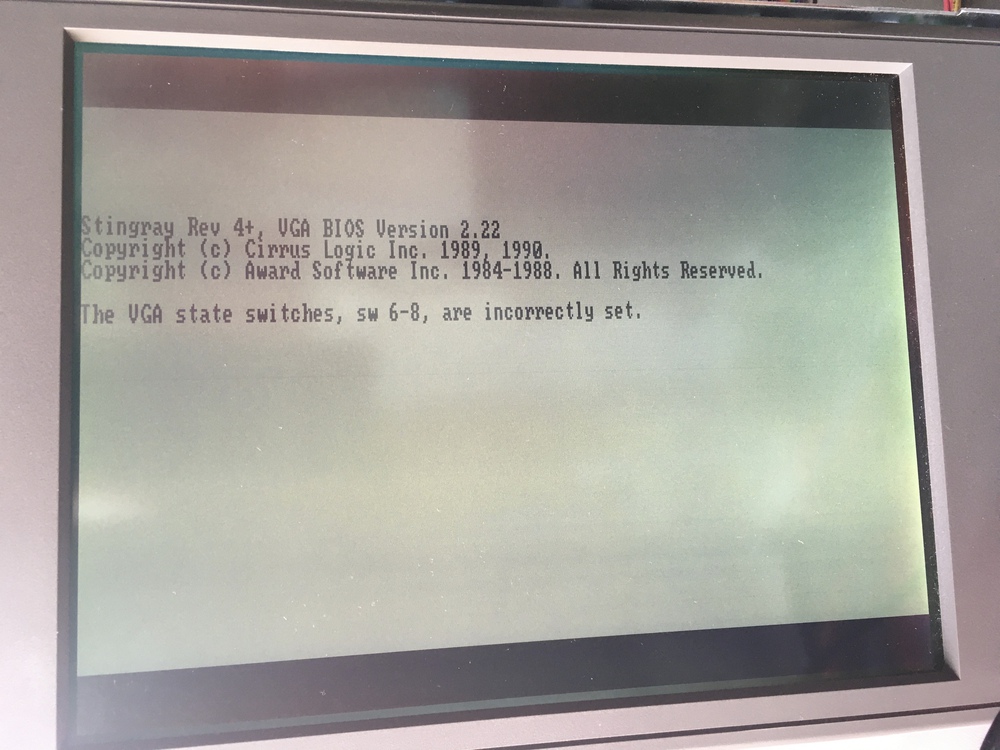
The VGA has its own BIOS that you see first, including possible error states, before the computer itself takes over
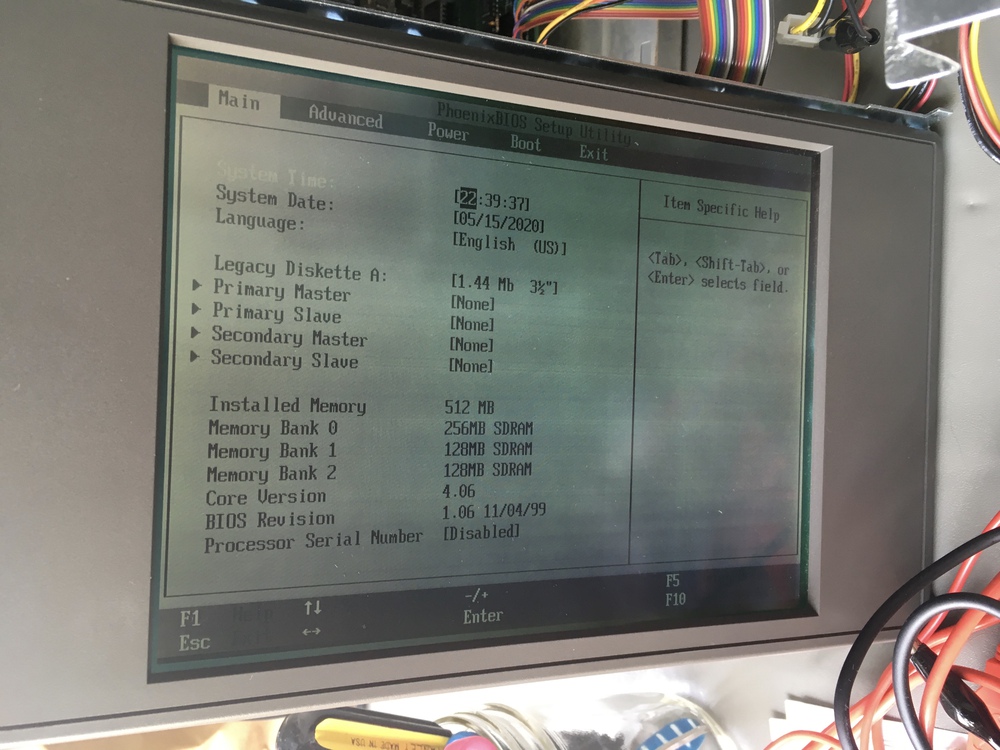
My computer’s BIOS
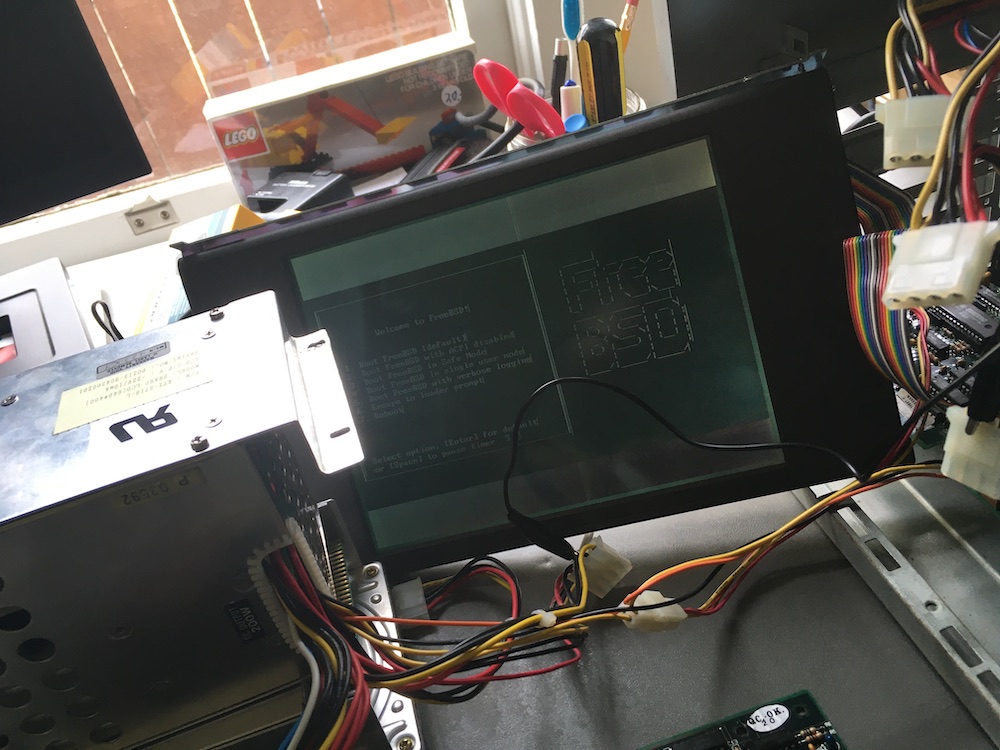
My computer’s FreeBSD operating system
I was expecting a monochrome display, so no huge surprises there. I haven’t yet been able to get the VGA port in the back to drive an external monitor. I think it has something to do with some signal sent by the monitor that my modern monitor isn’t doing, but that can wait. And there is another issue when I try to run the video card in VGA mode (versus CGA, MGA, or EGA) that I think is related to console fonts, character encoding, and modern operating system assumptions, but that can wait, too, since I want to get back to the vintage computer and its vintage operating system.
All of this with the LCD proves that at some point, providing I either fix or replace the motherboard, this computer should be able to run in its original case, on its original monitor, with its original keyboard.
Formally testing the motherboard 🔬
Turning the board on is one thing, and thus far, has only produced The Beep, so I kept digging and learned about motherboard analyzers. These are relatively cheap (mine was $12) and you plug them in like a peripheral. PC motherboards emit codes as they POST (power-on self-test). In normal operation, once the video is up, you’ll see these codes on the boot screen, or at least, you’ll get one of them as an error code if it doesn’t make it all the way. A good example here would be some bad RAM or a computer that requires a keyboard on boot but which you had unplugged.
The other thing that goes hand in hand with actual analysis is looking at and physically testing the traces on the board. I don’t know a ton about it yet, but if the battery corrosion damage I mentioned in the last post got to the surface of the board, there’s a chance that some of the traces (basically, the etched-on wiring connections) were broken or otherwise defective. I guess it’s a matter of chance whether that would let the board even start to boot, but since I can visibly see some potential damage, and I’m getting a beep, maybe it’s going partway? Is that possible?
I excitedly received and started using the analyzer yesterday. I was pretty quickly able to track down a good POST reference which includes what is called “AMI Old BIOS” for machines up to 1990. A lot of references will include more modern systems, and AMI (one of several BIOS makers) changed their codes later on.
Right off the bat, I was able to see a progression of POST codes, which means that it’s getting at least partway through boot.
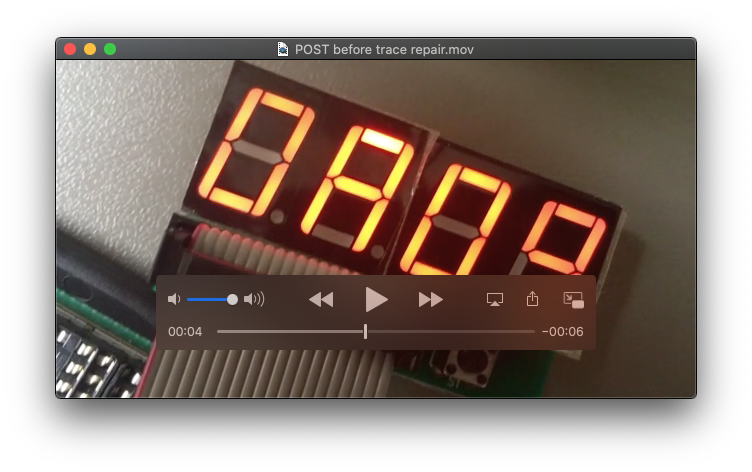
The codes that it ends up on correspond to About to look for optional video ROM and Optional video ROM control OK and come just before Display memory read/write test OK. I’m not sure exactly which of those is succeeding or failing (the tool’s manual is… challenging) but I don’t really care yet. I know where in the POST I am now, I can try to make some repairs, and then I can compare and see if that gets me further along.
One note: since these codes were video-related, I did try putting the video card back in to see if that helps. It didn’t. On my more modern computer, you get actual BIOS beep codes indicating the missing video card, which I would expect here, too. So I still need to move things along to get actual, distinguishable beep codes. Which leads me to…
Repairing the motherboard 😬
The battery corrosion leaves a lingering problem—potential damage to the motherboard which is causing enough parts to work that it starts to boot, but some others to fail.
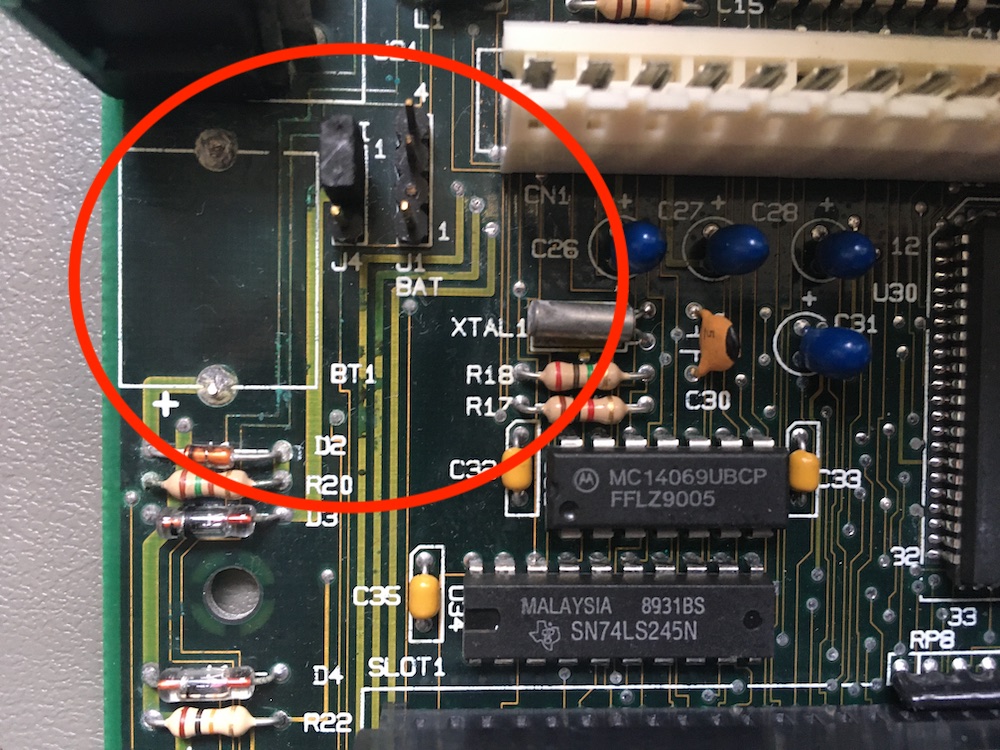
It’s pretty easy to see some potential problem spots. The circled area is about an inch and a half wide.
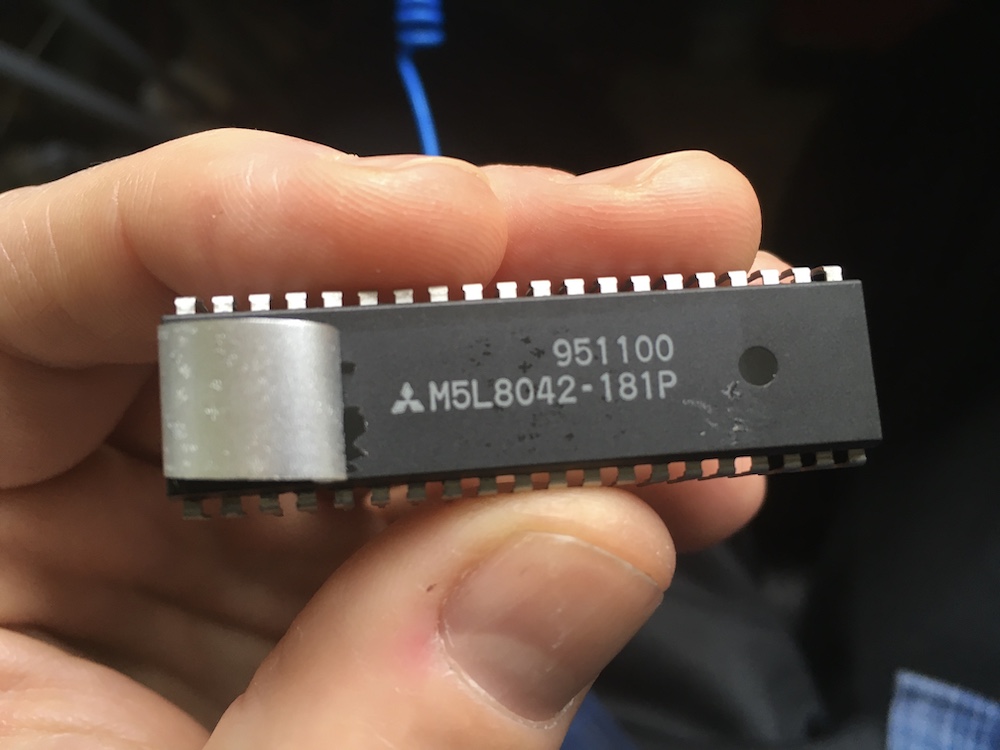
The keyboard connector off the photo in the top left (and its controlling microchip above that, the venerable Intel 8042) are near some problem spots, so keyboard controller failure is a possibility. I can’t figure that out until I get this computer to display on the screen, though, or give more meaningful beeps.
The empty rectangle BT1 and the two jumpers J4 and J1 BAT are related to the corroded battery, the setting for internal or external battery, and the connection for an external battery, which I also wrote about last time. It seems possible that interruptions here could cause boot problems, but I’d wager not and that they would just contribute to loss of BIOS settings between boots.
I did find that the vertical trace starting in the extreme lower left and going down off the picture is interrupted, so that’s a definite problem. It connects to one of several Texas Instruments SN74LS245N chips, which are still made and used today. You can see another one of these in the bottom center of the damage photo above. So at very least, I’ll need to fix that.
Even the ones I don’t really suspect, like the keyboard and the battery, should be fixed while I’m in there so that I can do it right the first time. I was encouraged by this video from a series, which shows me that this is something that I can take on and hopefully succeed at.
Repairing my 386SX Mainboard
My board doesn’t even seem to have as much damage or require removal of as big of parts as that repair, so I feel good about tackling that next.
Lastly: why? 🤔
I’ve had to stop a couple times during this project to ask myself: why? Why is this interesting, why am I keeping at it, and what do I hope to accomplish? This seems like a good general practice. Just as it’s easier for me to get obsessed, it’s harder to pick my head up, look around, put things in perspective, evaluate what else I need to be doing (this project or not!), and what I can consider various successes in a project.
Now that I know that the LCD and video card still work, it’s more motivating to revive the original version of everything, or replace them with vintage parts, rather than just gutting everything and, say, putting a Raspberry Pi or iPad or other modern hardware in an old case.
I’d like to not just throw an old piece of technology away. So much work went into its making, from mining and working with minerals, to decades of computer technology research and learning, to the creation of plastic, to so many other aspects. And I’d hate to see it in the trash can, useless. I’m beginning to be a bigger believer in repair culture.
I am continuing to fall in love with the scale of 1980s technology. Maybe it’s because it’s when I grew up, or maybe it’s because in these uncertain times, it’s reassuring to hold on to things from the past that comfort you. But at the very least, this is all at a scale that I can see and touch and change, mostly with things I’ve got around the house or can acquire cheaply.
Perhaps the biggest reason I am keeping at it is because I just love learning. I love reinforcing learning with real-world, hands-on experience. I already knew how sound works, or what POST codes were, but I had never researched them so thoroughly or experienced them at such a low level.
Maybe this computer will never boot. Maybe it will boot once. Maybe I will use it for a year, and then while showing someone else, a poof of magic smoke will be let out and I’ll never want to look at the thing again.
But the challenge is pretty fun right now.